Check out: http://craftycoffeelove.blogspot.com/
DIY projects ranging from recipes to fashion, what more could ya ask for?!
Like what you see? "Subscribe via e-mail" in the top right corner to receive updates when a new post is added! Never more than 1 e-mail a day. Find me on Facebook at http://www.facebook.com/NaturallyNourishing1 or on twitter @naturalnourish1
Saturday, August 27, 2011
Saturday, August 6, 2011
A little "Leave of Absence"
Hello All! First of all, please let me say THANK YOU sooo much for each of your continued support. I can't believe December will mark 1 year that I've had this blog.
Due to my upcoming due date (I reached full term Friday, yippeee!) I am going to have to take a bit of a hiatus. I'm not stopping the blog... there's SO much I still want to make and so many topics I still want to research/post about (I have scribbles with ideas and reminders all over the place of unturned subject matter I have left to explore) but I just don't want to commit to anything I'm not certain I can deliver on right now. I have already slowed down tremendously on making products and I feel pretty certain that it will all come to a screeching halt right after baby comes. Once we get into a groove, I plan on starting everything back up ASAP when I can fully commit.

I can't give an exact time frame, and I'm hoping to sprinkle in subject matter here and there as I can, but please know that my mission (and you all) wont be forgotten!! I feel like I say this way too much, but thank you all so much for your continued patience and support. I have been hearing so many stories recently of family members and friends that are trying products off the blog and catching the passion to start making products from home, that it makes this sooo much harder to walk away from right now (even if only momentarily). Please keep with it (maybe using this time to catch up on old postings and products?) and PLEASE pass along anything you discover along your journey. I have no idea how to say this without sounding over-the-top and as corny as physically possible, but each of you (and your feedback) are literally my inspiration. THANK YOU!!!!
Like what you see? "Subscribe via e-mail" in the top right corner to receive updates when a new post is added! Never more than 1 e-mail a day. Find me on Facebook at http://www.facebook.com/NaturallyNourishing1 or on twitter @naturalnourish1
Due to my upcoming due date (I reached full term Friday, yippeee!) I am going to have to take a bit of a hiatus. I'm not stopping the blog... there's SO much I still want to make and so many topics I still want to research/post about (I have scribbles with ideas and reminders all over the place of unturned subject matter I have left to explore) but I just don't want to commit to anything I'm not certain I can deliver on right now. I have already slowed down tremendously on making products and I feel pretty certain that it will all come to a screeching halt right after baby comes. Once we get into a groove, I plan on starting everything back up ASAP when I can fully commit.
I can't give an exact time frame, and I'm hoping to sprinkle in subject matter here and there as I can, but please know that my mission (and you all) wont be forgotten!! I feel like I say this way too much, but thank you all so much for your continued patience and support. I have been hearing so many stories recently of family members and friends that are trying products off the blog and catching the passion to start making products from home, that it makes this sooo much harder to walk away from right now (even if only momentarily). Please keep with it (maybe using this time to catch up on old postings and products?) and PLEASE pass along anything you discover along your journey. I have no idea how to say this without sounding over-the-top and as corny as physically possible, but each of you (and your feedback) are literally my inspiration. THANK YOU!!!!
Like what you see? "Subscribe via e-mail" in the top right corner to receive updates when a new post is added! Never more than 1 e-mail a day. Find me on Facebook at http://www.facebook.com/NaturallyNourishing1 or on twitter @naturalnourish1
QUOTE(S) OF THE DAY
 |
| Norman Rockwell "The Waiting Room" |
Patience is something you admire in the driver behind you and scorn in the one ahead. ~Mac McCleary
Adopt the pace of nature: her secret is patience. ~Ralph Waldo Emerson
Patience and perseverance have a magical effect before which difficulties disappear and obstacles vanish. ~John Quincy Adams
One moment of patience may ward off great disaster. One moment of impatience may ruin a whole life. ~Chinese Proverb
Like what you see? "Subscribe via e-mail" in the top right corner to receive updates when a new post is added! Never more than 1 e-mail a day. Find me on Facebook at http://www.facebook.com/NaturallyNourishing1 or on twitter @naturalnourish1
First thoughts on making shaving cream and final thoughts on shaving cream
FIRST THOUGHTS:
Here is the recipe I used (with accompanying instructions)
*with my notes
Natural IngredientsA homemade recipe consists of a few essential ingredients. Everything should be easily found at a natural market, such as a Whole Foods store.
Four tablespoons of an essential fatty acid-rich oil. Sweet almond, jojoba, and apricot all work really well. *I used grape-seed oil*
Instructions
How to make shaving cream? First heat the oil and skin nourisher over a double boiler at a low heat. Stir until the mixture is clear, then pour into a large bowl and let cool. In another pan, heat the water, then add the baking soda, and castile soap, stirring until completely diluted. Add the aloe vera gel or honey to this solution and stir. Pour the soap mixture into the bowl with the now room-temperature oil and skin nourisher. Add essential oils if desired. Blend everything very well with a hand mixer, or throw into the blender. For best results, blend for two minutes, stop, and then blend again for another two minutes. *Beware, blending causes this mixture to foam and increase in amount considerably. I strongly recommend letting the blended mixture "settle"- letting the foam die down, before transferring to container(s)*
Store the cream in an airtight container in a dry, cool location. This natural cream can be stored for about three months; none of the ingredients are perishable but oils such as sweet almond and apricot have a limited shelf life. This is a great opportunity to reuse old jelly jars or pickle jars. Wash well with soap and warm water to get rid of any odor residues. Not only is this homemade shaving cream wonderful for personal use, but also makes a great eco-friendly gift for someone else.
Parts and Price
Organic Shea Butter (if chosen): $7.99
Organic Grapeseed oil (if chosen): $3.99
Organic Castile Soap: $3.99
Essential Oil of your choice: (prices vary considerably depending on oil chosen and size of oil)
Raw Honey: (prices vary considerably depending on size of raw honey)
Total: approx $16 (assuming you have none of these ingredients on hand previously)
The Process: Easy enough. I just mixed ingredients (as described above) in two separate jars, then soaked in a hot water bath (boil water in a larger bowl, then place a smaller bowl inside that bowl for mixing. Just make sure no water from the larger bowl gets in your mixing bowl!) while stirring. Once your two mixtures have cooled, combine and blend. I chose to do this in a blender and, as I mentioned before, it foamed and expanded considerably. If you wait a few minutes the solution dies down and becomes much easier to handle.
Complaints: Again, if you don't have any of these ingredients at your house already, it's an investment. Luckily ALL of the ingredients easily serve multiple purposes and have several uses, so I don't see any money "wasted." Due to how many products I have made from home now, each product is becoming much less of an investment for me. Also, the more knowledgeable you become about each ingredient the more you learn what can be substituted for what and what can be left out, etc. Other than price, I was alarmed at how thin the mixture is. I would hesitate to call this a shaving "cream" but more of a shaving "serum" or "liquid." It is a bit watery which can make for harder application.
Compliments: Easy to make and ingredients were easy to find. Also, although the solution is thin, it feels AMAZING when used. I don't think I will even need to use lotion on my legs the days that I shave because this is so ridiculously moisturizing. My Husband used it on his face and loved it. It feels (and smells) very light and refreshing. It serves its purpose (protecting your skin from the razor) while having an added bonus of actually being good for your skin. One batch of this made enough for my Husband and I to each have 1 full jar.
My Final Thoughts:
Cons- Up front price you have to pay if you don't own any of the ingredients, how thin the mixture is.
Pros- Easy to make, it REALLY works. Also, every ingredient is natural, chemical free, and beneficial to skin health. No hard to pronounce ingredients. Next time you're in the shower, grab your can of shaving cream and see how many ingredients it has + how many of them you know. I checked the back of mine and got to ingredient #2 before having no clue what was in it. All of these unnecessary ingredients going onto your skin and into your pores. Also, if you go the organic route (purchasing organic shaving cream to eliminate some unwanted chemicals) you will see that they run anywhere from $7-$20+ dollars for smaller portions than you're accustomed to.
Overall- This product is an investment, but because of how much it will get used, I can justify it. I also love how nourishing it is to the skin.
Bottom line, it works.
Like what you see? "Subscribe via e-mail" in the top right corner to receive updates when a new post is added! Never more than 1 e-mail a day. Find me on Facebook at http://www.facebook.com/NaturallyNourishing1 or on twitter @naturalnourish1
Here is the recipe I used (with accompanying instructions)
*with my notes
Natural IngredientsA homemade recipe consists of a few essential ingredients. Everything should be easily found at a natural market, such as a Whole Foods store.
Two tablespoons of a natural skin nourisher and moisturizer, such as shea butter, cocoa butter, or beeswax.
*I decided to add a few drops of vitamin E since it is so fab for skin*
One and one-half cup of water; use a distilled or filtered water for the purest source.
One teaspoon of baking soda, which acts to soften and protect the skin.
Four tablespoons of castile soap. Castile soap is vegetable oil-based, usually from olive oil, coconut oil, or jojoba oil. It can be found in liquid form, which is easier to use for this shaving cream recipe; in bar form, simply grate the soap. Dr. Bronner's is probably the most popular manufacturer of this eco-friendly, natural product.
One-half cup of either aloe vera gel or honey, this ingredient is optional, but really beneficial for people with sensitive skin.
Essential oils, again, they are an optional, natural aromatic. For men's shaving cream, use three drops of pine essential oil and three drops of bergamot; for women's shaving cream, use three drops each of rose essential oil, and lavender. *I used lemongrass essential oil (I had purchased previously for homemade body spray) b/c it is a "relaxer" and unisex scent*
Instructions
How to make shaving cream? First heat the oil and skin nourisher over a double boiler at a low heat. Stir until the mixture is clear, then pour into a large bowl and let cool. In another pan, heat the water, then add the baking soda, and castile soap, stirring until completely diluted. Add the aloe vera gel or honey to this solution and stir. Pour the soap mixture into the bowl with the now room-temperature oil and skin nourisher. Add essential oils if desired. Blend everything very well with a hand mixer, or throw into the blender. For best results, blend for two minutes, stop, and then blend again for another two minutes. *Beware, blending causes this mixture to foam and increase in amount considerably. I strongly recommend letting the blended mixture "settle"- letting the foam die down, before transferring to container(s)*
Store the cream in an airtight container in a dry, cool location. This natural cream can be stored for about three months; none of the ingredients are perishable but oils such as sweet almond and apricot have a limited shelf life. This is a great opportunity to reuse old jelly jars or pickle jars. Wash well with soap and warm water to get rid of any odor residues. Not only is this homemade shaving cream wonderful for personal use, but also makes a great eco-friendly gift for someone else.
 |
| Grapeseed Oil, Castile Soap, Shea butter, honey, vitamin E and lemongrass essential Oil |
Organic Shea Butter (if chosen): $7.99
Organic Grapeseed oil (if chosen): $3.99
Organic Castile Soap: $3.99
Essential Oil of your choice: (prices vary considerably depending on oil chosen and size of oil)
Raw Honey: (prices vary considerably depending on size of raw honey)
Total: approx $16 (assuming you have none of these ingredients on hand previously)
The Process: Easy enough. I just mixed ingredients (as described above) in two separate jars, then soaked in a hot water bath (boil water in a larger bowl, then place a smaller bowl inside that bowl for mixing. Just make sure no water from the larger bowl gets in your mixing bowl!) while stirring. Once your two mixtures have cooled, combine and blend. I chose to do this in a blender and, as I mentioned before, it foamed and expanded considerably. If you wait a few minutes the solution dies down and becomes much easier to handle.
Complaints: Again, if you don't have any of these ingredients at your house already, it's an investment. Luckily ALL of the ingredients easily serve multiple purposes and have several uses, so I don't see any money "wasted." Due to how many products I have made from home now, each product is becoming much less of an investment for me. Also, the more knowledgeable you become about each ingredient the more you learn what can be substituted for what and what can be left out, etc. Other than price, I was alarmed at how thin the mixture is. I would hesitate to call this a shaving "cream" but more of a shaving "serum" or "liquid." It is a bit watery which can make for harder application.
Compliments: Easy to make and ingredients were easy to find. Also, although the solution is thin, it feels AMAZING when used. I don't think I will even need to use lotion on my legs the days that I shave because this is so ridiculously moisturizing. My Husband used it on his face and loved it. It feels (and smells) very light and refreshing. It serves its purpose (protecting your skin from the razor) while having an added bonus of actually being good for your skin. One batch of this made enough for my Husband and I to each have 1 full jar.
My Final Thoughts:
Cons- Up front price you have to pay if you don't own any of the ingredients, how thin the mixture is.
Pros- Easy to make, it REALLY works. Also, every ingredient is natural, chemical free, and beneficial to skin health. No hard to pronounce ingredients. Next time you're in the shower, grab your can of shaving cream and see how many ingredients it has + how many of them you know. I checked the back of mine and got to ingredient #2 before having no clue what was in it. All of these unnecessary ingredients going onto your skin and into your pores. Also, if you go the organic route (purchasing organic shaving cream to eliminate some unwanted chemicals) you will see that they run anywhere from $7-$20+ dollars for smaller portions than you're accustomed to.
Overall- This product is an investment, but because of how much it will get used, I can justify it. I also love how nourishing it is to the skin.
Bottom line, it works.
Like what you see? "Subscribe via e-mail" in the top right corner to receive updates when a new post is added! Never more than 1 e-mail a day. Find me on Facebook at http://www.facebook.com/NaturallyNourishing1 or on twitter @naturalnourish1
Thursday, July 21, 2011
What I will be making next...a homemade shaving cream!
There are a ton of recipes for this and I haven't quite narrowed down which one I am going to use yet, but I can assure you that they all look MUCH simpler than I anticipated. I have to use "sensitive skin" creams and still never feel completely satisfied, so I'm excited to see if this may be the answer! I will be making this on or before 8/1/11.
Stay tuned!
Like what you see? "Subscribe via e-mail" in the top right corner to receive updates when a new post is added! Never more than 1 e-mail a day. Find me on Facebook at http://www.facebook.com/NaturallyNourishing1 or on twitter @naturalnourish1
 |
| A product for guys AND gals! yay! |
Like what you see? "Subscribe via e-mail" in the top right corner to receive updates when a new post is added! Never more than 1 e-mail a day. Find me on Facebook at http://www.facebook.com/NaturallyNourishing1 or on twitter @naturalnourish1
*Side Note* Cornstarch for heat-rash and sweat control
If you're one of the lucky states this summer suffering from an unholy heatwave, you may be looking for natural remedies for a heat-rash or excess sweat, try cornstarch! It draws out and absorbs the moisture in your skin and creates a soothing/cooling feeling. It can also be used in areas where sweat pools to keep it dry. This may be one of the reasons our home-made deodorant (with cornstarch) works so well!
Another tip; bone up on your spinach intake, or take some flax seed oil. Foods rich in essential fatty acids (salmon is great too!) will help you get over your heat-rash in less time.

Like what you see? "Subscribe via e-mail" in the top right corner to receive updates when a new post is added! Never more than 1 e-mail a day. Find me on Facebook at http://www.facebook.com/NaturallyNourishing1 or on twitter @naturalnourish1
Another tip; bone up on your spinach intake, or take some flax seed oil. Foods rich in essential fatty acids (salmon is great too!) will help you get over your heat-rash in less time.
Like what you see? "Subscribe via e-mail" in the top right corner to receive updates when a new post is added! Never more than 1 e-mail a day. Find me on Facebook at http://www.facebook.com/NaturallyNourishing1 or on twitter @naturalnourish1
Saturday, July 16, 2011
Benefits of Lanolin, Vitamin E, Honey, and Vegetable Glycerin
If you're like me, you like knowing the "whats" and "whys" of the different products you use. Like "why is that good to use" or "what exactly does that do?" So I've taken the main ingredients for the lip-gloss and broken down those answers for you below. These are very brief descriptions, but will give you an idea of the part each ingredient plays. Click the product name for a link with more information.
Lanolin: A waxy oil derived from sheep's skin. This ingredient traps moisture into the skin and draws humidity from the air in, creating a great source of hydration for skin/hair.
Vitamin E: An antioxidant that has great benefits whether ingested orally or applied topically. Can reduce acne, help to reduce scarring, work as a protector against sun damage and other pollutants, also moisturizes skin.
Honey: When applied to skin- attracts and retains moisture, has anti-inflammatory properties that can help heal wounds, filled with anti-oxidants that fight off free radicals giving it an anti-aging property.
Vegetable Glycerin: An earth friendly, popular cosmetic additive. A natural source of moisture that also retains moisture making it a great skin softener. Not only makes skin look good, may have a positive affect on skin conditions.
So now you know a little more about these products (yet another bonus of making products from home, you can recognize and customize every ingredient in your products, no unnecessary preservative or chemicals)!
Like what you see? "Subscribe via e-mail" in the top right corner to receive updates when a new post is added! Never more than 1 e-mail a day. Find me on Facebook at http://www.facebook.com/NaturallyNourishing1 or on twitter @naturalnourish1
*Side Note* SUPER quick and easy DIY lip-gloss for kids
 |
| Kicking myself that I didn't capture any pictures of this process, but these are darn near identical to what our finished products looked like :) |
If you're going to be hosting a slumber party, or if you're looking for a great indoor activity for your Daughter's, Granddaughters, nieces, etc. you HAVE TO TRY THIS! At one point this past week we had a total of 7 girls in our house (ages 2,4,5 and on... all the way up to 15), and thought this would be the perfect time to try it out!
What you'll need...
- Vaseline
- A variety of Kool-Aid packets
- Small containers to hold the gloss (can be found at Wal-Mart 2/$1)
- Toothpicks or something to stir with
- Wax paper or some other surface to lay down so that creativeness can run rampant
- If you're feeling fancy you can add 1 or more of these items (powdered glitters, vitamin E, fun bags or containers for decorating to take the gloss home in, etc)
Like what you see? "Subscribe via e-mail" in the top right corner to receive updates when a new post is added! Never more than 1 e-mail a day. Find me on Facebook at http://www.facebook.com/NaturallyNourishing1 or on twitter @naturalnourish1
QUOTE OF THE DAY

"A perfect summer day is when the sun is shining, the breeze is blowing, the birds are singing, and the lawn mower is broken."
-James Dent
Like what you see? "Subscribe via e-mail" in the top right corner to receive updates when a new post is added! Never more than 1 e-mail a day. Find me on Facebook at http://www.facebook.com/NaturallyNourishing1 or on twitter @naturalnourish1
First thoughts on making lip-gloss AND Final Review on lip-gloss
CLICK HERE to see where I got my recipe inspiration!
FIRST THOUGHTS:
Parts and Price
Organic Lanolin: $7.99
Organic Vegetable Glycerin: $3.99
Organic Castor Oil: $3.99
Organic Vitamin E Oil: $5.99
Honey: $2.99
Total: $25 (approx. prices vary dramatically depending on size and brand)
Here is how I decided to make it:
1 TBL LANOLIN
1 TBL CASTOR OIL
1 TSP VEGETABLE GLYCERIN
1 TSP HONEY
A FEW DROPS OF VITAMIN E OIL
The Process: Super easy, just mix everything in a hot water bath (boil water in a larger bowl, then place a smaller bowl inside that bowl for mixing. Just make sure no water from the larger bowl gets in your mixing bowl!)
Complaints: If you don't have any of these ingredients at your house already, this lip-gloss is an investment. I decided to bite the bullet and spring for all of the ingredients that I didn't have already because they all have multiple uses (I have been wanting to get some Vitamin E oil to add to my moisturizers, the lanolin will be used when I breastfeed, and the castor oil I already use for my face-wash... the OCM).
Compliments: Easy to make and ingredients were easy to find. Also, as I said, I was excited about purchasing most of these because I had been wanting them for other projects.
My Final Thoughts:
Cons- Yet another smell complaint. The lip-gloss definitely doesn't smell bad, it just doesn't have that nice smell of other lip glosses/chapsticks I have grown accustomed to. It smells "raw" if that makes sense... it basically smells like the ingredients I added, with lanolin being the most significant. My suggestion would be to add an essential oil of your choice, or some vanilla to give it a little pinch of yummy smell :) Also, if you are wanting a tinted lip gloss, it takes some practice. Berries seem to be the most natural way to color the gloss (smash and strain them before adding) but this takes some knowledge of what berries produce what color... well, knowledge or trial and error, that's why I decided to skip a tint this time. If you keep the gloss colorless, it will apply as a clear coating.
Pros- Easy to make, it REALLY works... and if you go the unscented/non-colored route, your Man can use it too! It feels really good on your lips, not gloopy or globby.
Overall- This product is a great example of what an investment choosing a more "natural" lifestyle can be. Other than the time investment it takes to make your own products, it is also a financial investment at times. I think the majority of products I have made generally cost less or equal to their store-bought counter part- although they generally seem to work better. Occasionally I will come across products like these that really make me evaluate what's "worth it." Once I start researching the ingredients, I typically get so excited about their multiple benefits/uses that I can justify just about any purchase. Also, I know once I get the goods to make a more expensive product initially, I will have enough to make that product a ton of times over. Each person has to decide where they draw the line. For me, the investments I have been making seem to be paying off. I choose to make products that I will use frequently (normally daily) so that I feel I am getting my "money's worth" out of them. I also feel like these small changes of daily use items will make the greatest impact in my family's life down the line. I now have a little cupboard full of my left-overs from previous projects and as it grows, the amount I have to spend on newer projects shrinks.
Bottom line, this lip-gloss/chapstick really, really works and LASTS. It is a lot softer and smoother than I anticipated, not waxy or hard at all.
*If you will be making this, my two tips would be: add something (fresh berries smashed and strained/vanilla/essential oil) for scent. Also, this mixture can easily be poured into an old chapstick/lip gloss applicator you are using now. Whether it's a wand, or stick, just boil the applicator to clean it and pour this liquid inside. Once you've poured the mixture in, place it in the fridge/freezer and it will solidify. I did this with an old soft lips and it works great! Once it solidifies, it will stay solid. No need to keep it in fridge or freezer*
Like what you see? "Subscribe via e-mail" in the top right corner to receive updates when a new post is added! Never more than 1 e-mail a day. Find me on Facebook at http://www.facebook.com/NaturallyNourishing1 or on twitter @naturalnourish1
FIRST THOUGHTS:
Parts and Price
Organic Lanolin: $7.99
Organic Vegetable Glycerin: $3.99
Organic Castor Oil: $3.99
Organic Vitamin E Oil: $5.99
Honey: $2.99
Total: $25 (approx. prices vary dramatically depending on size and brand)
Here is how I decided to make it:
1 TBL LANOLIN
1 TBL CASTOR OIL
1 TSP VEGETABLE GLYCERIN
1 TSP HONEY
A FEW DROPS OF VITAMIN E OIL
 |
| Whoops, forgot to picture the honey! |
Complaints: If you don't have any of these ingredients at your house already, this lip-gloss is an investment. I decided to bite the bullet and spring for all of the ingredients that I didn't have already because they all have multiple uses (I have been wanting to get some Vitamin E oil to add to my moisturizers, the lanolin will be used when I breastfeed, and the castor oil I already use for my face-wash... the OCM).
Compliments: Easy to make and ingredients were easy to find. Also, as I said, I was excited about purchasing most of these because I had been wanting them for other projects.
My Final Thoughts:
Cons- Yet another smell complaint. The lip-gloss definitely doesn't smell bad, it just doesn't have that nice smell of other lip glosses/chapsticks I have grown accustomed to. It smells "raw" if that makes sense... it basically smells like the ingredients I added, with lanolin being the most significant. My suggestion would be to add an essential oil of your choice, or some vanilla to give it a little pinch of yummy smell :) Also, if you are wanting a tinted lip gloss, it takes some practice. Berries seem to be the most natural way to color the gloss (smash and strain them before adding) but this takes some knowledge of what berries produce what color... well, knowledge or trial and error, that's why I decided to skip a tint this time. If you keep the gloss colorless, it will apply as a clear coating.
Pros- Easy to make, it REALLY works... and if you go the unscented/non-colored route, your Man can use it too! It feels really good on your lips, not gloopy or globby.
Overall- This product is a great example of what an investment choosing a more "natural" lifestyle can be. Other than the time investment it takes to make your own products, it is also a financial investment at times. I think the majority of products I have made generally cost less or equal to their store-bought counter part- although they generally seem to work better. Occasionally I will come across products like these that really make me evaluate what's "worth it." Once I start researching the ingredients, I typically get so excited about their multiple benefits/uses that I can justify just about any purchase. Also, I know once I get the goods to make a more expensive product initially, I will have enough to make that product a ton of times over. Each person has to decide where they draw the line. For me, the investments I have been making seem to be paying off. I choose to make products that I will use frequently (normally daily) so that I feel I am getting my "money's worth" out of them. I also feel like these small changes of daily use items will make the greatest impact in my family's life down the line. I now have a little cupboard full of my left-overs from previous projects and as it grows, the amount I have to spend on newer projects shrinks.
Bottom line, this lip-gloss/chapstick really, really works and LASTS. It is a lot softer and smoother than I anticipated, not waxy or hard at all.
 |
| Finished lip balm. I was going to post a picture of how the balm looks once applied, but I figured a close up picture of my lips would be uncomfortable for everyone involved ;) |
Like what you see? "Subscribe via e-mail" in the top right corner to receive updates when a new post is added! Never more than 1 e-mail a day. Find me on Facebook at http://www.facebook.com/NaturallyNourishing1 or on twitter @naturalnourish1
Thursday, June 30, 2011
QUOTE OF THE DAY
Summer is the time when one sheds one's tensions with one's clothes, and the right kind of day is jeweled balm for the battered spirit. A few of those days and you can become drunk with the belief that all's right with the world. ~Ada Louise Huxtable
Like what you see? "Subscribe via e-mail" in the top right corner to receive updates when a new post is added! Never more than 1 e-mail a day. Find me on Facebook at http://www.facebook.com/NaturallyNourishing1 or on twitter @naturalnourish1
 |
| image from:wallpaperstock.net |
Like what you see? "Subscribe via e-mail" in the top right corner to receive updates when a new post is added! Never more than 1 e-mail a day. Find me on Facebook at http://www.facebook.com/NaturallyNourishing1 or on twitter @naturalnourish1
*Side Note* Don't throw out those soap bar slivers (or hotel bar soaps)!
If your soap bar is down to a little "unusable" sliver, try these ideas to get the full life out it!
Like what you see? "Subscribe via e-mail" in the top right corner to receive updates when a new post is added! Never more than 1 e-mail a day. Find me on Facebook at http://www.facebook.com/NaturallyNourishing1 or on twitter @naturalnourish1
 |
| Our favorite bar soap. Smells soooo good! |
- Slit a sponge to make a pocket to hold the slivers. Wet and squeeze the sponge for foamy suds. Or fill a sock with soap slivers and use it the same way
- Place soap slivers in a sock to use as a body scrubber in the shower
- Toss leftover soap bars into a blender with water and transform them into a creamy, liquid soap. Pour this substance into empty squeeze bottles, and keep one at each sink.
- Use the soap to write on windows (i.e. on your car window if you have a car for sale)
- Leave the slivers in your sock draw to keep everything smelling fresh
- Keep them all in zip-lock bags and use for travel
- Shave it down to a powder and use for hand-washed clothes
Some ideas taken from "Emilie's Creative Home Organizer"
Like what you see? "Subscribe via e-mail" in the top right corner to receive updates when a new post is added! Never more than 1 e-mail a day. Find me on Facebook at http://www.facebook.com/NaturallyNourishing1 or on twitter @naturalnourish1
*Side Note* What to do with leftover beverages
If you have extra lemons or leftover lemonade, squeeze fresh lemons and juice in ice cube trays. Transfer the frozen cubes into freezer bags. Defrost for fresh lemon juice anytime, or drop a cube in a glass of water for a lemony kick.
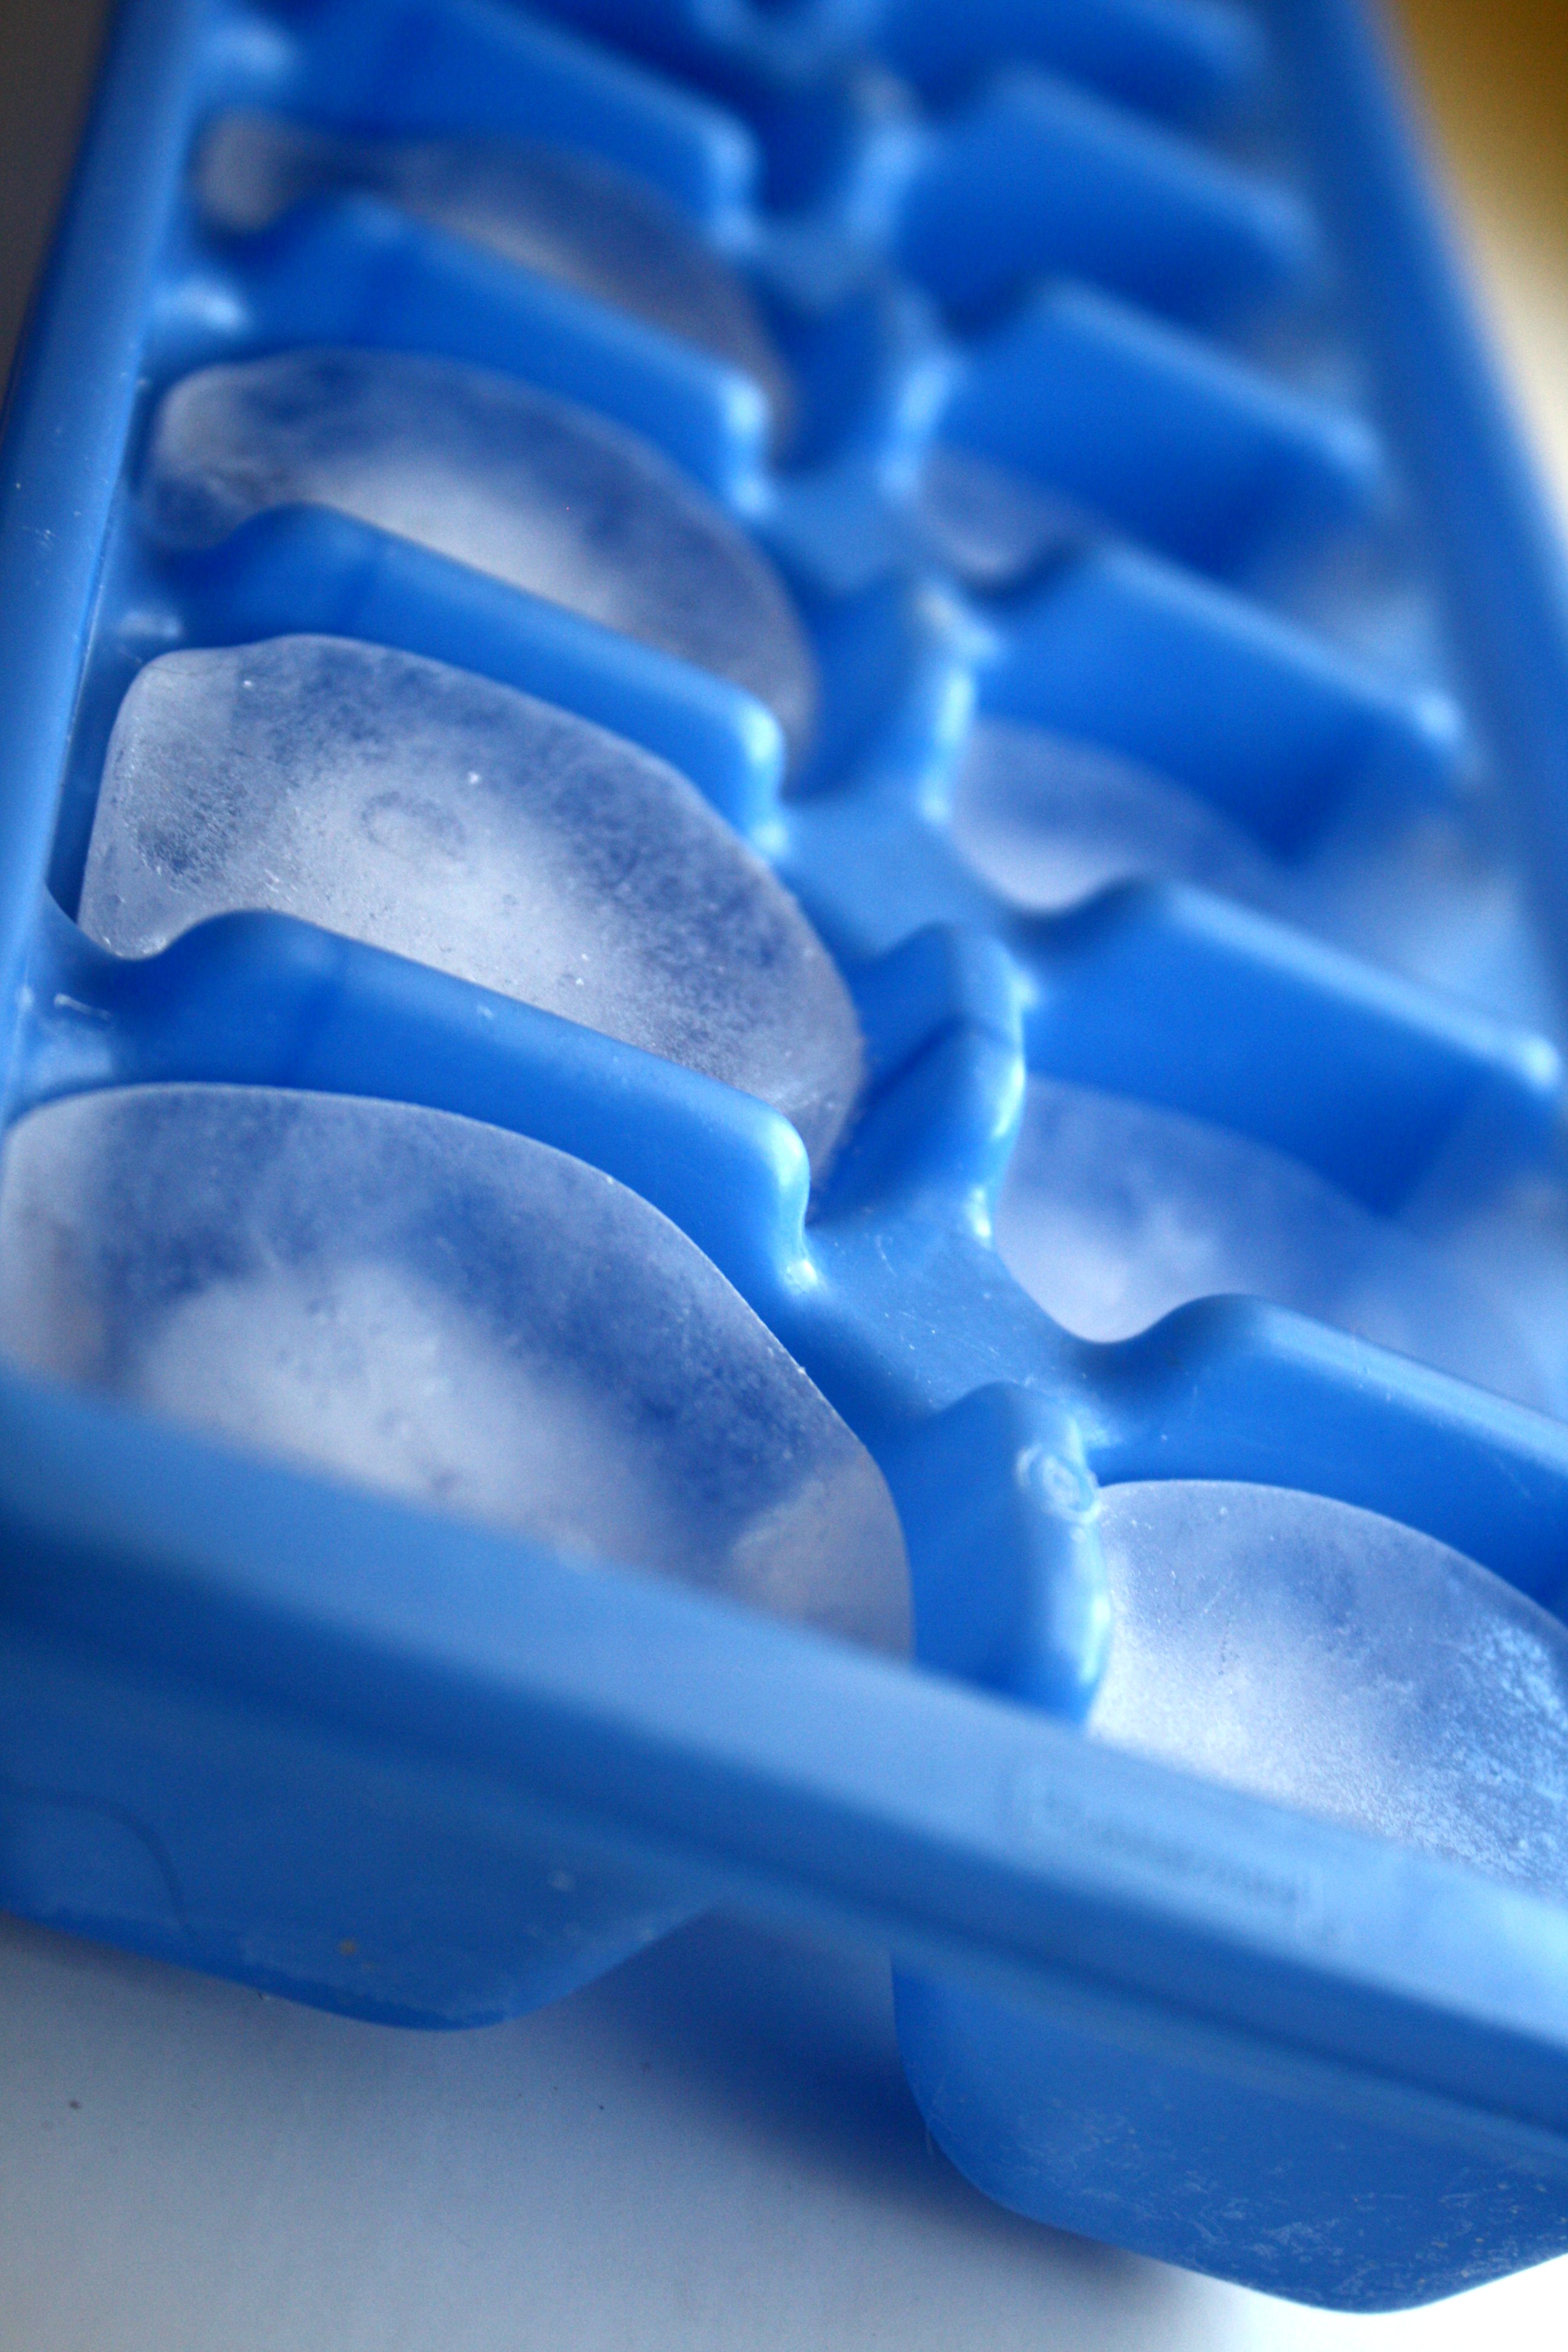
Freeze extra coffee in ice-cube trays. Add the cubes of iced coffee for an extra-strength brew. Or whirl the cubes in the blender with ice cream, milk, or chocolate milk for a coffee slush. You can also enrich meat gravies with coffee for a robust flavor. Coffee in frosting makes for a luscious mocha cream.
Most any beverage can be frozen in an ice cube tray to use later as an added kick to any drink. Good luck experimenting!
*Several tips taken from Emilie's Creative Home Organizer*
What do you do with your leftover liquids?
Like what you see? "Subscribe via e-mail" in the top right corner to receive updates when a new post is added! Never more than 1 e-mail a day. Find me on Facebook at http://www.facebook.com/NaturallyNourishing1 or on twitter @naturalnourish1
Wednesday, June 29, 2011
Once again, my apologies
For those of you who are sweet enough and supportive enough of me to notice that my postings have dwindled, thank you SO much for your patience and understanding. This blog brings me an incredible amount of joy and like an old friend, I think of it often when I am away from it for too long. I have a long list of excuses (moving, a 21 month old, full-time school...) but I know life isn't going to slow down and I want to make this a priority.
That being said, I think I am going to have to cut back on the amount of products I am making for awhile. With 8 weeks 'til sweet baby girl #2 gets here, I don't want to over-commit and under-deliver. I haven't decided what the perfect balance is yet, so for now, I will take it one product at a time and kind of set finish dates as I go. Thank you all again for your support and encouragement. It means the world to me!!
Like what you see? "Subscribe via e-mail" in the top right corner to receive updates when a new post is added! Never more than 1 e-mail a day. Find me on Facebook at http://www.facebook.com/NaturallyNourishing1 or on twitter @naturalnourish1
QUOTE OF THE DAY
Rest is not idleness, and to lie sometimes on the grass on a summer day listening to the murmur of water, or watching the clouds float across the sky, is hardly a waste of time. ~John Lubbock

Like what you see? "Subscribe via e-mail" in the top right corner to receive updates when a new post is added! Never more than 1 e-mail a day. Find me on Facebook at http://www.facebook.com/NaturallyNourishing1 or on twitter @naturalnourish1
Like what you see? "Subscribe via e-mail" in the top right corner to receive updates when a new post is added! Never more than 1 e-mail a day. Find me on Facebook at http://www.facebook.com/NaturallyNourishing1 or on twitter @naturalnourish1
What I will be making next... tinted lip-gloss!

Let's try this again :) As you may or may not remember, I have attempted to make this before. Unfortunately, 99.9% of these recipes call for grated bees wax, which I couldn't find, so I hunted around and I think I will use a combination of a few recipes I have found (below)
RECIPE IDEAS #1
RECIPE IDEAS #2
RECIPE IDEAS #3
I will post my exact recipe (and process) once I make it. Look for that post around 7/15/11!
Like what you see? "Subscribe via e-mail" in the top right corner to receive updates when a new post is added! Never more than 1 e-mail a day. Find me on Facebook at http://www.facebook.com/NaturallyNourishing1 or on twitter @naturalnourish1
Final Review on Body Spray
Due to my EXTREME tardiness on making this one, I combined the "thoughts on process" and "final review" below...
My Final Thoughts:
Cons- Not sure I love the smell of the essential oil I used (lemongrass).
Pros- Easy to make, inexpensive, makes a boat-load. As long as you like the essential oil you chose, you could probably make this body spray (with the first round of ingredients you purchased) for years to come without having to refill your stash.
Overall- If you are looking for a light, refreshing, inexpensive DIY body spray, this is for you. It is relatively inexpensive to collect all of the ingredients ($10 max) and as I mentioned before, once you purchase what you need, you shouldn't need to re-purchase for a very long time. The downside is experimenting with the different essential oils and finding which one you like. If you have a favorite scent already, this will probably come very easy for you but I have the hardest time when I'm in the EO aisle picking a favorite. I chose lemongrass because it has a slew of properties (click the links to read more) that are fantastic! Some include: relaxer/nerve-calming, insecticide = great for summer, anti-depressant, etc. -it even reduces gas in the intestinal tract! I mean, what more could a gal ask for? I also decided to use lemongrass because I wanted something unisex that (if he so desired) could be used by both my Husband and I.
I decided to combine a few of the recipes I found and make mine with 1 tablespoon witch hazel, 1 cup water, 10 drops lemongrass, and 1 drop rose otto for fun. I then just shook it all up and voila! If you are looking for a very light, fresh, and well, "lemony" scent then you will love this combination. I have found that I don't like the smell very much when I first spray it, but once it has settled in I love it. By the way, this scent seems to linger for quite a while, much longer than some of my store bought ones. My biggest complaint with the lemongrass is that it's not strong enough. I decided after making this that I kinda want a spray that makes me smell like I just got out of a Grecian bath of rose petals and lavender... too much? Ha, either way I want something strong and beautiful, this is more light and fresh (which is normally right up my alley!) so I may give it another go with a few different essential oils until I find the perfect combo. Until then, I plan on keeping this in my fridge to make it extra refreshing to use throughout the summer.
*As a side note I will say that after using my bronzer with rose otto for awhile, I really like the scent that it leaves me with and have gotten kind of spoiled with the bronzer/ perfume duo.*
Like what you see? "Subscribe via e-mail" in the top right corner to receive updates when a new post is added! Never more than 1 e-mail a day. Find me on Facebook at http://www.facebook.com/NaturallyNourishing1 or on twitter @naturalnourish1
 |
| image from: expressandstar |
Cons- Not sure I love the smell of the essential oil I used (lemongrass).
Pros- Easy to make, inexpensive, makes a boat-load. As long as you like the essential oil you chose, you could probably make this body spray (with the first round of ingredients you purchased) for years to come without having to refill your stash.
Overall- If you are looking for a light, refreshing, inexpensive DIY body spray, this is for you. It is relatively inexpensive to collect all of the ingredients ($10 max) and as I mentioned before, once you purchase what you need, you shouldn't need to re-purchase for a very long time. The downside is experimenting with the different essential oils and finding which one you like. If you have a favorite scent already, this will probably come very easy for you but I have the hardest time when I'm in the EO aisle picking a favorite. I chose lemongrass because it has a slew of properties (click the links to read more) that are fantastic! Some include: relaxer/nerve-calming, insecticide = great for summer, anti-depressant, etc. -it even reduces gas in the intestinal tract! I mean, what more could a gal ask for? I also decided to use lemongrass because I wanted something unisex that (if he so desired) could be used by both my Husband and I.
I decided to combine a few of the recipes I found and make mine with 1 tablespoon witch hazel, 1 cup water, 10 drops lemongrass, and 1 drop rose otto for fun. I then just shook it all up and voila! If you are looking for a very light, fresh, and well, "lemony" scent then you will love this combination. I have found that I don't like the smell very much when I first spray it, but once it has settled in I love it. By the way, this scent seems to linger for quite a while, much longer than some of my store bought ones. My biggest complaint with the lemongrass is that it's not strong enough. I decided after making this that I kinda want a spray that makes me smell like I just got out of a Grecian bath of rose petals and lavender... too much? Ha, either way I want something strong and beautiful, this is more light and fresh (which is normally right up my alley!) so I may give it another go with a few different essential oils until I find the perfect combo. Until then, I plan on keeping this in my fridge to make it extra refreshing to use throughout the summer.
*As a side note I will say that after using my bronzer with rose otto for awhile, I really like the scent that it leaves me with and have gotten kind of spoiled with the bronzer/ perfume duo.*
Like what you see? "Subscribe via e-mail" in the top right corner to receive updates when a new post is added! Never more than 1 e-mail a day. Find me on Facebook at http://www.facebook.com/NaturallyNourishing1 or on twitter @naturalnourish1
Sunday, June 5, 2011
Just a little more motivation to grow your own fruits and veggies...
First let's get one persistent canard out of the way. Yes, the tomato is technically a fruit, not a vegetable, but for purposes of economics the USDA classifies it as a vegetable, and as such it is the second most popular vegetable in the nation after that other burger staple, lettuce. This is surprising in only one respect: A vast majority of the tomatoes consumed in the U.S. every year ($5 billion worth), are devoid of the flavor and nutritive value they once had.
Sure, that plant your neighbor gave you that's just beginning to enjoy the summer heat will produce lots of delicious, succulent tomatoes come August or September. But in his new book, Tomatoland: How Modern Industrial Agriculture Destroyed our Most Alluring Fruit, two-time James Beard Award-winning journalist Barry Estabrook tells us why the modern factory-farmed tomato in most grocery stores is a poster child for nearly everything that is wrong with industrial agriculture. A recent USDA study, he points out, says that the average tomato of today, the kind on your Whopper or Taco Bell taco, has "30 percent less vitamin C, 30 percent less thiamin 19 percent less niacin, and 62 percent less calcium than it did in the 1960s. But that modern tomato does shame its 1960s counterpart in one respect: It contains 14 times as much sodium."
This is because the tomatoes grown in the fields in and around Immokalee, Florida, where nearly one third of the tomatoes consumed in the U.S. are grown, are bred for one thing and one thing only. And it's not flavor, and it's not nutrition. It's shipability, period. To qualify as grade A in that department, it needs to be a specific size, and a specific shape, and it needs to be picked while still green and rock hard. In fact, Estabrook relays a story of nearly losing control of his car as it was pelted with the tough green orbs bouncing off the back of a tractor-trailer on a Florida highway. The fruits hit the pavement at 60 mph and rolled to the gravel shoulder unscathed.
Like what you see? "Subscribe via e-mail" in the top right corner to receive updates when a new post is added! Never more than 1 e-mail a day. Find me on Facebook at http://www.facebook.com/NaturallyNourishing1 or on twitter @naturalnourish1
Thursday, May 26, 2011
*Guest Post* Plants for Summer Harvest
"There is nothing quite like the experience of working hard to plant different vegetables and fruits and reaping the benefit of theirharvest. I have been gardening since I was a little kid. Every spring my mom and I would plant a large numbers of items and harvest a bounty of goods in thesummer! With my husband going back to school on the new GI Bill, I found myself having some extra time and decided to start a garden, both to help the earth and myfamily. Additionally, having participated online in some nutrition classes froma distance learning university helped out when I was trying to figure what plants would be best nutrition-wise.
We would have the most incredible meals in the summer madewith food we actually grew ourselves. The freshness simply cannot be beat, andthe satisfaction gained from growing your own garden.
My favorite time to plant is in the spring after the lastthaw. I love to finally get into the garden and begin planting the seeds. There are many things that I enjoy planting, but there are a specific few that arebest to plant in spring to be able to harvest in summer. My absolute favorite thing to plant in the spring is zucchini. Zucchini grows like wildflowers andproduces some of the most beautiful vegetables that you could never find in the grocery store. They grow to be rather large and are so flavorful.
Another one of my favorites is tomatoes! Tomatoes are the perfect things to plant in the spring because they will render the juiciest,best-tasting tomatoes you have ever had. We plant tomatoes all over our garden because we eat so many of them, and want the biggest bounty possible. Tomatoes are wonderful because they are easy growers and are so versatile in thekitchen.
In addition to zucchini and tomatoes, squash, cucumber,basil and cilantro are wonderful to plant in the spring. Squash, like zucchini,grows rather rapidly and produces a wonderful crop. The plant can overrun your garden, so it must be pruned and planted with room to spread. Cucumber is another fantastic plant that is fun to grow. My mother was always keen ongrowing herbs and her favorite were basil and cilantro. Both of those herbs grow with relative ease and are perfect for spring planting and summer picking.
It’s hard to find any food or meal that isn’t improved bythe addition of fresh herbs; especially picked from your garden. I love to make a cold pasta salad with my zucchini, squash, tomatoes, cucumbers and fresh herbs.The flavor combination is out of this world and so very healthy! No matter whatyou want to grow, I encourage you to get out and plant anything! The rewards are tasty, nutritious and fun to experience!"
Karen is a long time blogger, and a life long gardener. She now enjoys sharing her gardening hobby with her kids when they are home from their outdoor education school.
Like what you see? "Subscribe via e-mail" in the top right corner to receive updates when a new post is added! Never more than 1 e-mail a day. Find me on Facebook at http://www.facebook.com/NaturallyNourishing1 or on twitter @naturalnourish1
Monday, May 23, 2011
An article on "Why should I buy organic?"
CLICK HERE for the full article (taken from "Healthy Bellies Happy Babies")
an excerpt:
Like what you see? "Subscribe via e-mail" in the top right corner to receive updates when a new post is added! Never more than 1 e-mail a day. Find me on Facebook at http://www.facebook.com/NaturallyNourishing1 or on twitter @naturalnourish1
an excerpt:
Why should I buy Organic?
I always hear the reason why people don't buy organic is because its much more expense then the alternative brands; I get that, but I've been doing my research on why eating organic is so important. So here is why.
The Environmental Working Group recommends buying organic whenever possible. It is the smartest way to reduce your exposure to pesticides; Pesticides are toxic by design. They are created to kill living organisms -such as insects, plants, and fungi. Many pesticides pose health dangers to people. These risks have been established by independent research scientists and physicians across the world.
As acknowledged by U.S. and international government agencies, different pesticides have been linked to a variety of health problems, including:
Finally, organic foods are healthier for you. The research on whether consuming organic food is healthier for people remains inconclusive. However, the USDA's own tests show that most non-organic produce contain residual pesticides even after washing. The long term effects of consuming these pesticides has not been sufficiently studied, but most research shows that they aren't good for you.
Things to do to limit your exposure to Pesticides:
Starting with the Best and down to the Worst!
The Environmental Working Group recommends buying organic whenever possible. It is the smartest way to reduce your exposure to pesticides; Pesticides are toxic by design. They are created to kill living organisms -such as insects, plants, and fungi. Many pesticides pose health dangers to people. These risks have been established by independent research scientists and physicians across the world.
As acknowledged by U.S. and international government agencies, different pesticides have been linked to a variety of health problems, including:
- nervous system toxicity
- cancer
- hormone system effects
- skin, eye and lung irritation
- Lower IQ in children (recent studies done out of Mount Sinai, Columbia, Beekley)
Finally, organic foods are healthier for you. The research on whether consuming organic food is healthier for people remains inconclusive. However, the USDA's own tests show that most non-organic produce contain residual pesticides even after washing. The long term effects of consuming these pesticides has not been sufficiently studied, but most research shows that they aren't good for you.
Things to do to limit your exposure to Pesticides:
- Wash, Scrub and Peel your fruits and vegetable's
- Buy organic for those fruits and vegetable's that cant be peeled
- Discard the outer leaves on leafy vegetable's
- Meats/Poultry/Fish - take off skin and trim fat since pesticides affect these areas most
Starting with the Best and down to the Worst!
- Onions (Best)
- Avocado
- Sweet Corn (Frozen)
- Pineapples
- Mango's (Subtropical and Tropical)
- Sweet Peas (frozen)
- Asparagus
- Kiwi Fruit (Subtropical and Tropical)
- Cabbage
- Eggplant
- Cantaloupe (Domestic)
- Watermelon
- Grapefruit
- Sweet Potatoes
- Honeydew Melon
- Plums (Domestic)
- Cranberries
- Winter Squash
- Broccoli
- Bananas
- Tomatoes
- Cauliflower
- Cucumbers (Domestic)
- cantaloupe (Imported)
- Grapes (Domestic)
- Oranges
- Red Raspberries
- Hot Peppers
- Green Beans (Imported)
- Cucumbers (Imported)
- Summer Squash
- Plums (Imported)
- Pears
- Green Beans (Domestic)
- Carrots
- Blueberries
- Lettuce (Imported)
- Grapes (Imported)
- Potatoes
- Kale/Collard Greens
- Cherries
- Spinach
- Sweet Bell Peppers
- Nectarines
- Blueberries (Domestic)
- Apple
- Strawberries
- Peaches
- Celery (Worst)
Like what you see? "Subscribe via e-mail" in the top right corner to receive updates when a new post is added! Never more than 1 e-mail a day. Find me on Facebook at http://www.facebook.com/NaturallyNourishing1 or on twitter @naturalnourish1
Sunday, May 22, 2011
*Side Note* Quick and Easy DIY artwork
I don't normally post things like this, but because decorating/remodeling has been our main focus the past few weeks (and will be our focus the next few months) these are the little things that are occupying my time right now :). I thought I would share in case anyone is getting a little crafting itch as the weather warms up. Not necessarily "eco-friendly" but definitely budget friendly! Hopefully these will give you a little inspiration...
So here's what I did:
Project 1
Spray paint ugly frames white
Project 2
Make "wall art" (scrapbook paper + modge podge + canvas)

Project 4
Paint, paint, paint; a rocking chair, toddler bed, kitchen table, etc. haven't started this one yet... yikes!
Share your cheap and easy DIY with me! I need some inspiration!
Like what you see? "Subscribe via e-mail" in the top right corner to receive updates when a new post is added! Never more than 1 e-mail a day. Find me on Facebook at http://www.facebook.com/NaturallyNourishing1 or on twitter @naturalnourish1
So here's what I did:
 |
| Lost my "before" picture, but it was a hideous dark, fake wood frame |
 |
| "before" this picture actually makes it look a little better than it was |
 |
| "After" looks bright and sunny! |
Spray paint ugly frames white
Project 2
Make "wall art" (scrapbook paper + modge podge + canvas)
 |
| Project 2, this picture doesn't really do them justice :( these turned out so cute! |

Project 3
Make more "wall art" (scrapbook paper + modge podge + matting paper- for framing)
Project 4
Paint, paint, paint; a rocking chair, toddler bed, kitchen table, etc. haven't started this one yet... yikes!
Share your cheap and easy DIY with me! I need some inspiration!
Like what you see? "Subscribe via e-mail" in the top right corner to receive updates when a new post is added! Never more than 1 e-mail a day. Find me on Facebook at http://www.facebook.com/NaturallyNourishing1 or on twitter @naturalnourish1
Thursday, May 19, 2011
Body Spray postponement... (please don't hate me)
Due to my delayed trial and reviews on the OCM, everything has gotten pushed back a little bit. I am going to attempt to make the body spray by 6/1 (ish). We are moving that weekend so I may be a little delayed again, but please know I will post just as soon as I can!
This lull in making new products would be a FABULOUS time for you to revisit some of your favorites, or to read up on older ones you may have missed! Just type "final review" into the little search box at the top left of the blog and you can see a list of what I've made to date... if you see a final review on something you're interested in, just follow the links back for all the info you need.
Good luck, and as always please e-mail if you have trouble finding anything or if you just feel like saying hello :)
Like what you see? "Subscribe via e-mail" in the top right corner to receive updates when a new post is added! Never more than 1 e-mail a day. Find me on Facebook at http://www.facebook.com/NaturallyNourishing1 or on twitter @naturalnourish1
Final Reviews on the Oil Cleansing Method
First, let me start by saying thank you all soooo much for your patience! This school semester is officially over and I am a free bird until summer school (yippee)! I apologize for running late on this review, but I assure you it was worth the wait :)
CLICK HERE to read my initial thoughts on parts, price, and process.
My Final Thoughts:
Cons- The smell of EVOO. Unfortunately, since the start of this pregnancy I can barely stand the thought of even cooking with EVOO. I used to use it almost daily, but something about it has me weirded out now? Anyway, this probably wont be a problem for the majority of you all, but if you are finicky about smells, remember that there are several different oils you can experiment with here (jojoba, grapeseed, almond, etc).
Pros- For fear of sounding like a broken record: easy to make, chemical free, and most importantly, it works! You HAVE to try this. Even if it's just once in a blue to give yourself a little mini facial. It feels sooo good and your skin will be soft and glowing. The whole process of rubbing it into your skin, then laying a warm damp cloth across your face... it's so fancy feeling, and I know each and every one of you could stand to take an extra second on yourself (even if it's just a fleeting moment of serenity, pretending there isn't a 2 year old banging on your door saying "HEY! HEY! MOOOOOMMY!!") -just me?
That brings me to the second thing I love about this; you don't have to be in your bathroom to do it! All you need is your little cleaner and a warm damp cloth, but you can do it anywhere. If you're like me, there is no such thing as a quick and easy face rinse at the bathroom sink. Whether I'm brushing my teeth or washing my face, the wreckage I leave behind is enough to make you call your Mother. My Husband refuses to believe this type of mess if physically possible by 1 woman. Sometimes he sits and stares in disbelief as I try to daintily splash water on my face with my eyes closed (like the commercials). The end result looks like a I composed a blindfolded water painting across my bathroom sink and walls. Anyway, with this there's no water splashing, no lathering, you don't even have to close your eyes! Just rub the oil in, let the warm wash cloth sit for a moment, then wipe away!
Overall- Like I said, you have to try this. Remember, this if for EVERYONE dry and oily faces alike! You can take my word for it, or read my PREVIOUS POST explaining how it works for everyone. If you just clicked that link and read that post, you could have already washed your face with this method 3 times and just seen for yourself ;) I really hope you all try it. Experiment with oils based on your skin type and see what works best for you. I promise it doesn't take nearly as long as you think it does. I don't think I'll go back to face wash. I have been in dire need of something that works (and doesn't take the top layer of my skin with it). Besides, once you start using this there's a good chance you wont need face lotion anymore, what was that sound? Ohhh just the sound of $money$ being saved!
Let me know if you try it!!
Like what you see? "Subscribe via e-mail" in the top right corner to receive updates when a new post is added! Never more than 1 e-mail a day. Find me on Facebook at http://www.facebook.com/NaturallyNourishing1 or on twitter @naturalnourish1
CLICK HERE to read my initial thoughts on parts, price, and process.
 |
| I used 3 parts EVOO to 1 part Castor Oil (b/c I have drier skin). I didn't make much because I wanted to test it out first (and it doesn't take much) but that didn't keep me from making a gorgeous label... well... |
My Final Thoughts:
Cons- The smell of EVOO. Unfortunately, since the start of this pregnancy I can barely stand the thought of even cooking with EVOO. I used to use it almost daily, but something about it has me weirded out now? Anyway, this probably wont be a problem for the majority of you all, but if you are finicky about smells, remember that there are several different oils you can experiment with here (jojoba, grapeseed, almond, etc).
Pros- For fear of sounding like a broken record: easy to make, chemical free, and most importantly, it works! You HAVE to try this. Even if it's just once in a blue to give yourself a little mini facial. It feels sooo good and your skin will be soft and glowing. The whole process of rubbing it into your skin, then laying a warm damp cloth across your face... it's so fancy feeling, and I know each and every one of you could stand to take an extra second on yourself (even if it's just a fleeting moment of serenity, pretending there isn't a 2 year old banging on your door saying "HEY! HEY! MOOOOOMMY!!") -just me?
That brings me to the second thing I love about this; you don't have to be in your bathroom to do it! All you need is your little cleaner and a warm damp cloth, but you can do it anywhere. If you're like me, there is no such thing as a quick and easy face rinse at the bathroom sink. Whether I'm brushing my teeth or washing my face, the wreckage I leave behind is enough to make you call your Mother. My Husband refuses to believe this type of mess if physically possible by 1 woman. Sometimes he sits and stares in disbelief as I try to daintily splash water on my face with my eyes closed (like the commercials). The end result looks like a I composed a blindfolded water painting across my bathroom sink and walls. Anyway, with this there's no water splashing, no lathering, you don't even have to close your eyes! Just rub the oil in, let the warm wash cloth sit for a moment, then wipe away!
Overall- Like I said, you have to try this. Remember, this if for EVERYONE dry and oily faces alike! You can take my word for it, or read my PREVIOUS POST explaining how it works for everyone. If you just clicked that link and read that post, you could have already washed your face with this method 3 times and just seen for yourself ;) I really hope you all try it. Experiment with oils based on your skin type and see what works best for you. I promise it doesn't take nearly as long as you think it does. I don't think I'll go back to face wash. I have been in dire need of something that works (and doesn't take the top layer of my skin with it). Besides, once you start using this there's a good chance you wont need face lotion anymore, what was that sound? Ohhh just the sound of $money$ being saved!
Let me know if you try it!!
Like what you see? "Subscribe via e-mail" in the top right corner to receive updates when a new post is added! Never more than 1 e-mail a day. Find me on Facebook at http://www.facebook.com/NaturallyNourishing1 or on twitter @naturalnourish1
Subscribe to:
Posts (Atom)